XPipe: Application-Level Remote Control Between Two Windows Machines
Use XPipe to manage SSH and RDP connections, and use RemoteApp to show only the remote application window instead of taking over the whole remote desktop.
-1. Introduction
MobaXterm is getting old. How do you launch just one remote application window between two Windows machines — the way Linux X11 forwarding works — instead of the entire remote desktop?
The traditional approach is Windows' built-in Remote Desktop (mstsc). XPipe bundles connection management, SSH tunneling, and RDP together: excellent for lazy people. And XPipe has plenty of other features too — it seems it could fully replace MobaXterm.
This article records a practical path using Windows as an example: first establish an SSH connection, then carry RDP through the SSH tunnel, and finally create a RemoteApp so the remote program appears on the local desktop as an independent window.
0. Windows RDP and XPipe
What is Windows RDP?
RDP (Remote Desktop Protocol) is Windows' built-in remote desktop protocol, allowing users to connect to and operate another Windows computer over the network. It is full-featured and fairly low-latency, well suited to continuously using graphical applications.
What is XPipe?
XPipe is an open-source connection hub that lets you manage all of your remote connections — SSH, RDP, VNC, Docker, Kubernetes, and more — from your local desktop. Its biggest strength is that it doesn't require installing anything on the remote system; it works directly on top of the command-line tools you already have.
More importantly, XPipe's RDP support goes beyond just "launching mstsc for you". It takes advantage of RDP's RemoteApp feature to achieve showing only a specific remote application window instead of the whole desktop. That comes very close to the X11 forwarding experience on Linux.
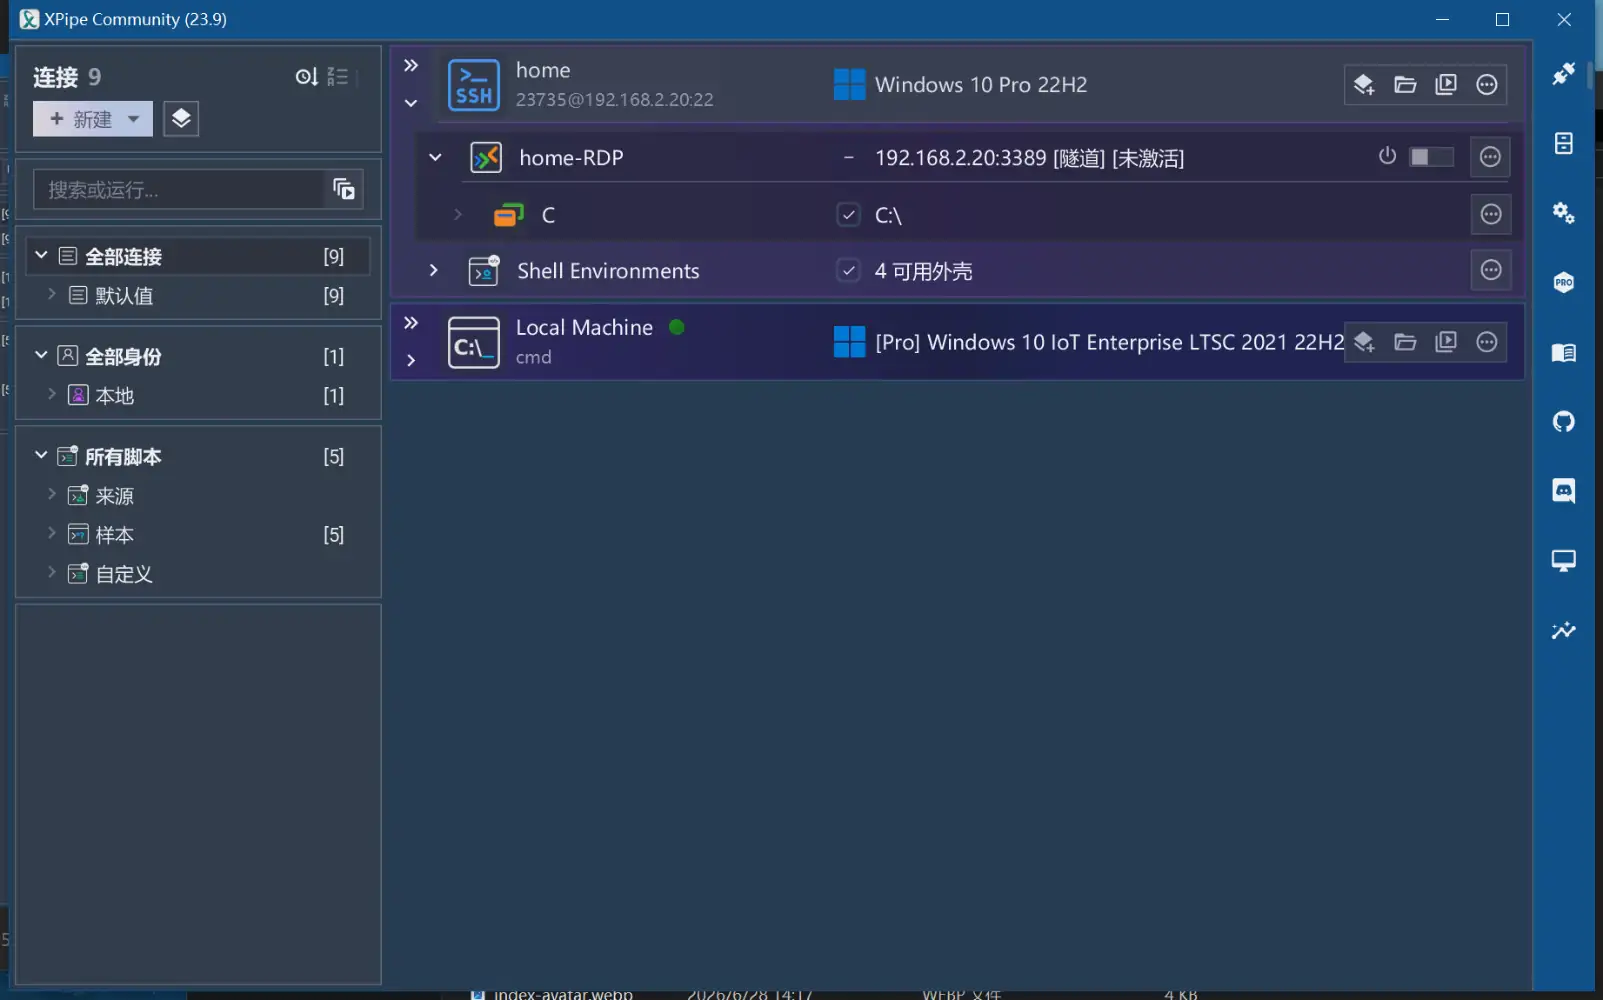
Security boundary: this article assumes both machines belong to you or that you have explicit authorization. RDP concurrency patches modify the system's remote desktop components, which may violate the system license, break security-update compatibility, and enlarge the remote login surface. In production, prefer Windows Server's proper multi-session licensing and official configurations.
1. Install XPipe and Configure SSH
Install XPipe
You can download the Windows installer from the XPipe website or from GitHub Releases, or use a package manager:
# Using Winget
winget install xpipe-io.xpipe --source winget

# Or use Chocolatey
choco install xpipe

# Download and run the install script directly with powershell
powershell -ExecutionPolicy Bypass -Command iwr "https://raw.githubusercontent.com/xpipe-io/xpipe/master/get-xpipe.ps1" -OutFile "$env:TEMP\get-xpipe.ps1" ";" "&" "$env:TEMP\get-xpipe.ps1"
After installation, launch XPipe; the interface looks like a connection manager where you can create SSH, RDP, and other types of connections.
Configure the SSH Connection
The core of this setup is forwarding RDP traffic through an SSH tunnel: RDP's port 3389 doesn't need to be exposed to the public internet, and you can reuse SSH's key authentication.
- In the XPipe main interface, click + to create a new connection and choose SSH.
- Fill in the remote Windows host's IP address, SSH port (default 22), and username.
- Choose password or key authentication and save.
- Test the SSH connection and confirm you can log in to the remote host normally.
Note: the controlled machine needs OpenSSH Server enabled. On newer Windows Server and Windows Pro editions, you can usually install the OpenSSH server via "Settings → Apps → Optional Features".
2. RDP Connection and Session Limits
Once the SSH connection is established, the next step is creating the RDP connection:
- Create a new RDP connection in XPipe and fill in the remote host's IP address and port (the local port forwarded through the SSH tunnel).
- Enter the remote Windows username and password.
- Save and test the RDP connection, confirming the remote desktop displays properly.
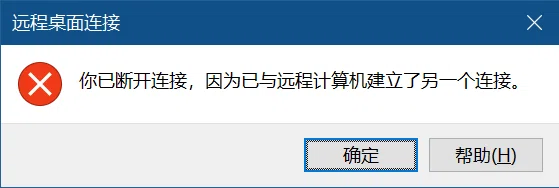
At this point you'll notice: the remote desktop shows up successfully, but the local user on the remote host gets kicked back to the login screen.
This is the single-session limitation of non-server Windows editions (including Pro) — only one user can be using the desktop at a time, whether locally or remotely.
Solution: Install an RDP Concurrency Patch
To use the same Windows machine locally and remotely at the same time, you need to break this single-session limit. The two most popular tools right now are:
- RDP Wrapper: download the RDP Wrapper project files from GitHub (stascorp/rdpwrap), extract them, right-click
install.batand choose "Run as administrator" to install, then check the support status withRDPConf.exe(success when the right side shows [fully supported].), and run a connection test withRDPCheck.exe. - TermsrvPatcher (verified): download TermsrvPatcher.ps1 from GitHub (fabianosrc/TermsrvPatcher), right-click the script file and choose "Run with PowerShell".
The script automatically stops the Remote Desktop Service, patches the DLL, then restarts the service, working around the version restrictions by modifying
termsrv.dll. Note: git-clone the repository first, otherwise it may throw an error about a missing digital signature.
After the patch is installed, restart the remote host once, then connect through XPipe's RDP connection and you'll find: the local user is still using the desktop while your remote connection is also online — the two can now coexist.
3. Create a Remote Desktop Application
SSH works and RDP concurrency is sorted out; now pull up only a specific remote application window.
How RemoteApp Works
RemoteApp doesn't convert the remote program into a local one; it keeps a remote RDP session alive while compositing only the specified application window onto the local desktop. The window can be dragged and minimized like an ordinary app and displayed side by side with local windows.
Steps
- Select the already-configured RDP connection in XPipe.
- Open the create menu and choose Desktop Application.
- Fill in the remote application's path and arguments.
- After saving, this application appears in XPipe's connection list. Clicking it launches the remote application's window directly, without showing the whole remote desktop.
For example, you can try these paths:
| Application | Path |
|---|---|
| Notepad | C:\Windows\System32\notepad.exe |
| File Explorer | C:\Windows\explorer.exe |
| Other programs | or any other location; it will be displayed as File Explorer |
4. Handling the Allow List (if you run into it)
Windows RDP servers may use an application allow list to restrict RemoteApp. The relevant registry location is:
HKEY_LOCAL_MACHINE\SOFTWARE\Microsoft\Windows NT\CurrentVersion\Terminal Server\TSAppAllowListIf you get an error like "the application is not on the allow list", troubleshoot in the following order:
- First check whether XPipe can handle the allow list automatically for tunneled RDP connections.
- Temporarily disable the allow list in a test environment, and export the corresponding registry key before modifying anything.
- More safely, register the names and paths of individual applications under
TSAppAllowList\Applications.
Disabling the allow list requires administrator privileges. Example command:
Set-ItemProperty -Path 'HKLM:\SOFTWARE\Microsoft\Windows NT\CurrentVersion\Terminal Server\TSAppAllowList' -Name "fDisabledAllowList" -Value 1This relaxes RemoteApp's launch restrictions, and also widens the range of programs that can be launched remotely. Unless you're in an isolated, controlled environment, disabling it globally is not recommended.
Summary
With the combination of XPipe + SSH tunnel + RDP concurrency patch + RemoteApp, we achieved:
| Traditional RDP | XPipe + RemoteApp |
|---|---|
| Shows the full remote desktop | Shows only the specified application window |
| May kick out the local user | Can operate in parallel when multi-session conditions are met |
| Usually connects directly to port 3389 | RDP can be carried through an SSH tunnel |
| Relies on RDP authentication | Connection management can reuse SSH keys and similar methods |
XPipe puts SSH's connectivity, RDP's graphics performance, and RemoteApp's window experience into a single management entry. Keep in mind that RemoteApp and multi-session capability still depend on the Windows edition, permissions, policies, and server-side configuration.
FAQ
Q1: What if the controlled-side account has no password?
Windows enables the Accounts: Limit local account use of blank passwords to console logon only policy by default. You can run secpol.msc, expand Computer Configuration -> Windows Settings -> Security Settings -> Local Policies -> Security Options, find that policy and disable it, which allows blank-password remote logon. But allowing blank-password remote logon reduces security and should only be used in a trusted intranet test environment.
Q2: Will Windows Update overwrite the concurrency patch?
It might. Updates can replace termsrv.dll or change compatibility, breaking RDP Wrapper or TermsrvPatcher. Before re-applying, re-confirm the source and version; don't blindly run unknown scripts from scheduled tasks.
Q3: Why must SSH be configured first?
XPipe's design philosophy is "forward RDP through an SSH tunnel", which is more secure (no need to expose port 3389) and lets you reuse SSH's authentication methods (keys, two-factor, etc.). If you already need a direct RDP connection, you can also create a plain RDP connection on its own, but application-level control and security will suffer.
Q4: Does XPipe support Linux and macOS?
XPipe itself is cross-platform (built on Java) and supports Windows, Linux, and macOS. This article uses Windows as an example, but the principles apply to other platforms too — you can even use XPipe on a Linux machine to connect to Windows over an SSH tunnel and launch a RemoteApp.
Q5: The remote GUI is lagging like crazy?
¯\_(ツ)_/¯